TESLAB AU
Headlight Paint Protection Film – Smoked
$105.99
FREE Shipping over $150
- Ships in 24 Hours
- 30 Day Returns Policy
- Easy Application Process
Smoked Headlight Paint Protection Film for Tesla
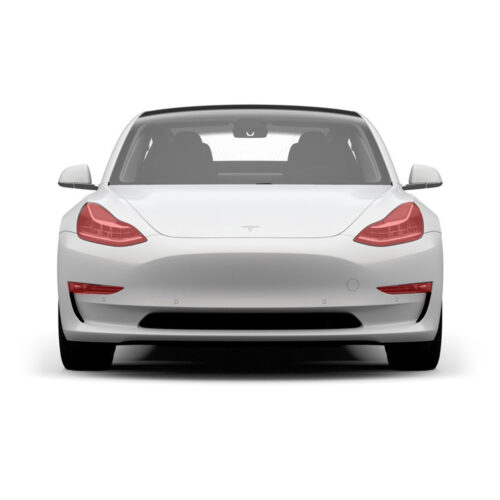
Transform and protect your Tesla’s headlights with our Smoked Headlight Paint Protection Film (PPF) Kit. This premium film not only safeguards your headlights from damage but also adds a sleek, tinted look that enhances your vehicle’s aesthetic appeal.
Key Features:
- Customized Fit: Precisely cut to fit Tesla’s headlight contours, our smoked PPF offers complete coverage with an impeccable finish.
- Enhanced Protection: Defend your headlights against chips, scratches, and UV damage while adding a stylish smoked effect.
- Self-Healing Technology: Minor scratches and imperfections disappear over time, thanks to the film’s self-healing properties.
- UV and Heat Resistant: The film provides excellent resistance to UV rays and heat, ensuring the smoked effect remains consistent over time.
- Stylish Smoked Appearance: Achieve a unique, custom look for your Tesla with the film’s smoked tint, which doesn’t compromise headlight clarity.
- Easy Installation: The kit includes all necessary tools and comprehensive instructions for a smooth, bubble-free application.
- Durable and Long-Lasting: Made with high-quality materials, our PPF is designed to withstand the test of time.
- Removable: The film can be safely removed if needed, without damaging the headlights or leaving any residue.
Kit Includes:
- Pre-cut smoked PPF sections for Tesla’s headlights
- Installation instructions
- Application squeegee
- Spray solution concentrate
Installation Tips:
Ensure the headlights are clean and dry before application. Apply in a dust-free environment, and use the squeegee to eliminate air bubbles and achieve a perfect finish.
Why Choose Our Smoked Headlight PPF Kit?
Our Smoked Headlight PPF Kit is the perfect blend of protection and style, offering a unique upgrade to your Tesla’s appearance while ensuring the longevity of your headlights.
Note: If you’re hesitant about the DIY process, consider seeking assistance from someone with PPF application experience, or watch our Teslab Master Class.
Ensure your vehicle’s headlights stay clear and protected with our custom-fit Headlight PPF. This guide provides step-by-step instructions for a seamless application.
Getting Ready:
Start in a clean, dust-free environment to prevent any particles from getting trapped under the film. Prepare your installation tools, which should include a squeegee, a spray bottle with soapy water, and a lint-free cloth.
Installation Procedure:
- Clean the Headlights: Thoroughly wash the headlights with a gentle cleaner to remove all dirt and debris. Dry them completely, then use an alcohol-based cleaner for a final wipe.
- Position the Film: Carefully align the PPF over each headlight. Check for proper alignment and coverage before removing the backing.
- Apply the Soapy Solution: Spray both the headlight surface and the adhesive side of the PPF with the soapy water solution. This allows you to reposition the film during installation.
- Apply the PPF: Gently place the PPF onto the headlight, starting from one corner and using a squeegee to smooth out the film towards the opposite corner. Ensure there are no air bubbles or wrinkles.
- Remove Excess Water: Carefully use the squeegee to push out any remaining water and air from underneath the film, working from the center outward to the edges.
- Trim and Finalize: If necessary, trim any excess material carefully, avoiding contact with the headlight’s surface.
- Curing: Allow the film to dry and set properly. Avoid washing or applying pressure to the headlights for at least 24 hours after installation.
For further guidance, watch our detailed installation video here.
Note: Proper curing is vital for the longevity of the PPF. Ensure adequate time is given for the film to fully adhere to the headlights.


